Introduction
As web3 developers, deploying smart contracts and utilizing APIs are essential skills. While many tutorials focus on using OpenZeppelin's online editor and Remix deployment feature, this article aims to guide developers who prefer Hardhat and JavaScript.
By following the step-by-step instructions, you will learn how to deploy contracts effectively with Hardhat and leverage the powerful features of Chainbase API services.
Prerequisites
- Node.js installed on your system
- Visual studio code
Setting Up the Development Environment
Make directory
mkdir chainbase-toturial
cd chainbase-toturial
Install Hardhat
running the following command:
npm install --save-dev hardhat
Then initialize hardhat to create the project boilerplates:
npx hardhat
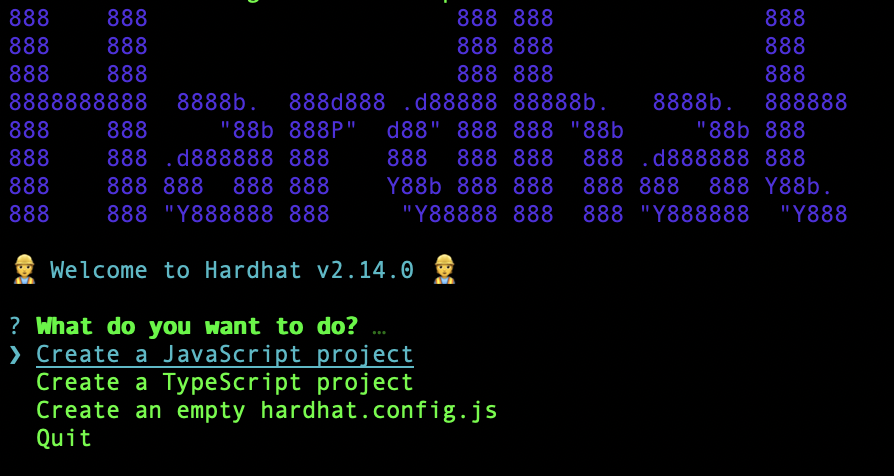
You should then see a welcome message and options on what you can do.
Select Create a JavaScript project:
Hardhat will then generate a "hardhat.config.js" file for us along with a couple of folders with sample code we can work with, including contracts, scripts, and test.
Open Visual Studio Code and click on File >> Open Folder. Choose the folder named "chainbase-tutorial". Inside the folder, you will find a file named "lock.sol". However, for the purpose of this tutorial, we will be deploying a simple Solidity contract. Therefore, please delete the "lock.sol" file and create a new Solidity file called "token.sol".
Writing and Compiling ERC Series Contracts
Go to the OpenZeppelin Smart Contract Wizard page and customize the token according to your preferences. For this example, we will select "DataMustFlow" as the token name and set the symbol to "DMF".
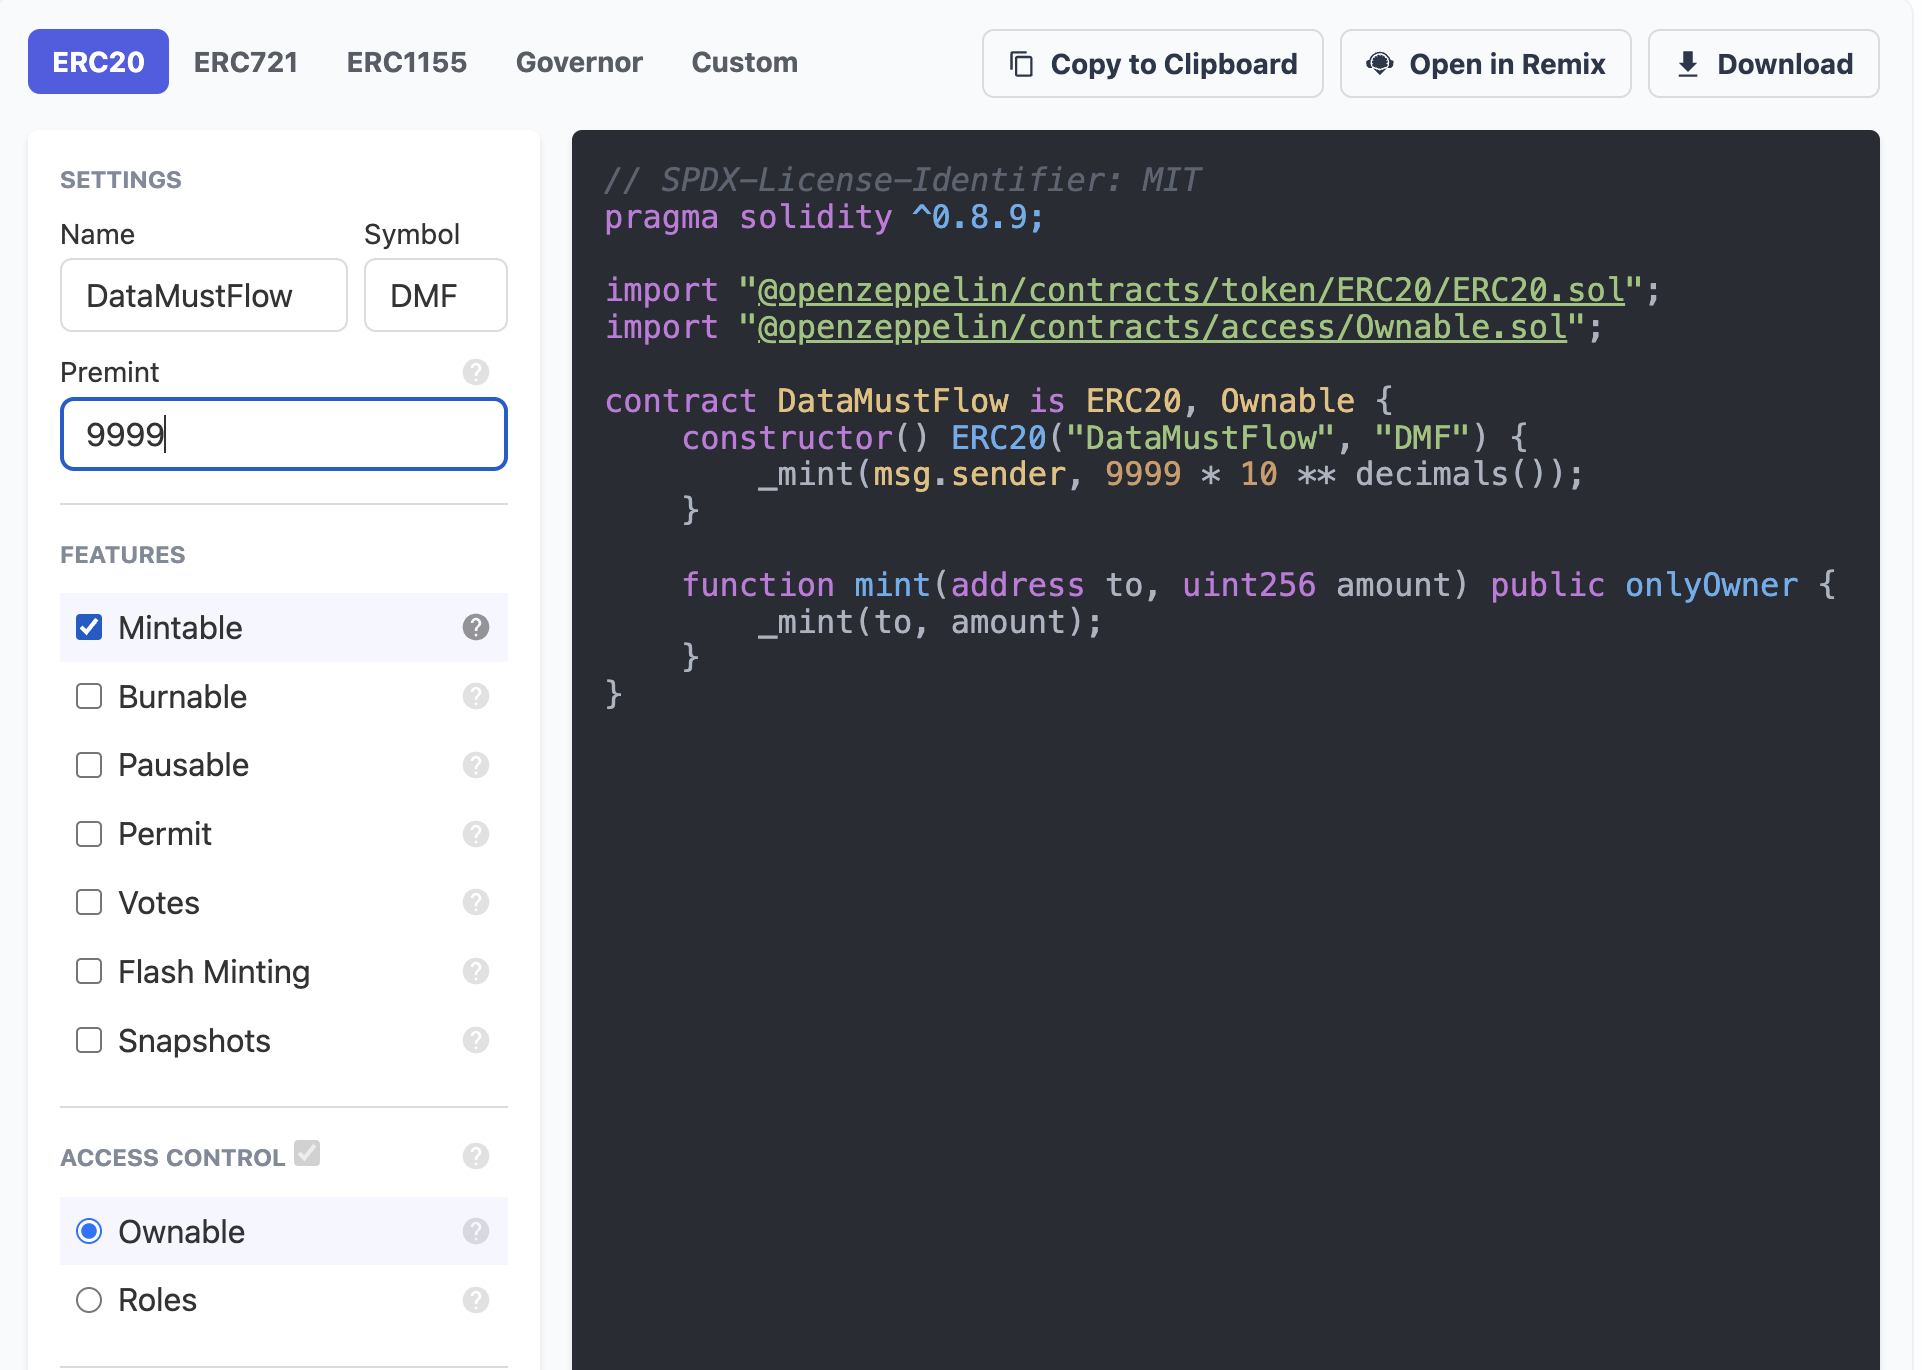
Put the following code into your Token.sol file. The Solidity code should resemble the following:
// SPDX-License-Identifier: MIT
pragma solidity ^0.8.9;

import "@openzeppelin/contracts/token/ERC20/ERC20.sol";
import "@openzeppelin/contracts/access/Ownable.sol";

contract DataMustFlow is ERC20, Ownable {
    constructor() ERC20("DataMustFlow", "DMF") {
        _mint(msg.sender, 9999 * 10 ** decimals());
    }

    function mint(address to, uint256 amount) public onlyOwner {
        _mint(to, amount);
    }
}
You may have noticed a red squiggly line under the
import "@openzeppelin/contracts/token/ERC20/ERC20.sol"; line.
Don't worry, this is because we haven't installed the open zeppelin contracts library, which provides secure smart contract development capabilities. It is built on a solid foundation of community-vetted code.
To resolve this, follow these steps:
Open your terminal and ensure that you are in the "/chainbase-tutorial" path.
Run the following command to install the "openzeppelin/contracts" library:
npm install @openzeppelin/contracts
This will download and install the necessary dependencies.
Once you have modified your smart contract, execute the following command to ensure that your code is complete and error-free:
npx hardhat compile
Navigate to the scripts directory located in the root directory of your project. Create a new file named deploy.js in that directory.
Open the deploy.js file and paste the desired code into it.
async function main() {
  const [deployer] = await ethers.getSigners();
  console.log("Chainbase, Ahead Four!");

  console.log("Deploying contracts with the account:", deployer.address);

  console.log("Account balance:", (await deployer.getBalance()).toString());

  const Token = await ethers.getContractFactory("DataMustFlow");
  const token = await Token.deploy();

  console.log("Deployed Contract address:", token.address);
}

main()
  .then(() => process.exit(0))
  .catch((error) => {
    console.error(error);
    process.exit(1);
  });
Registering for a Chainbase API Key
Let's go to chianbse.com click on “Get started” and create a new account:
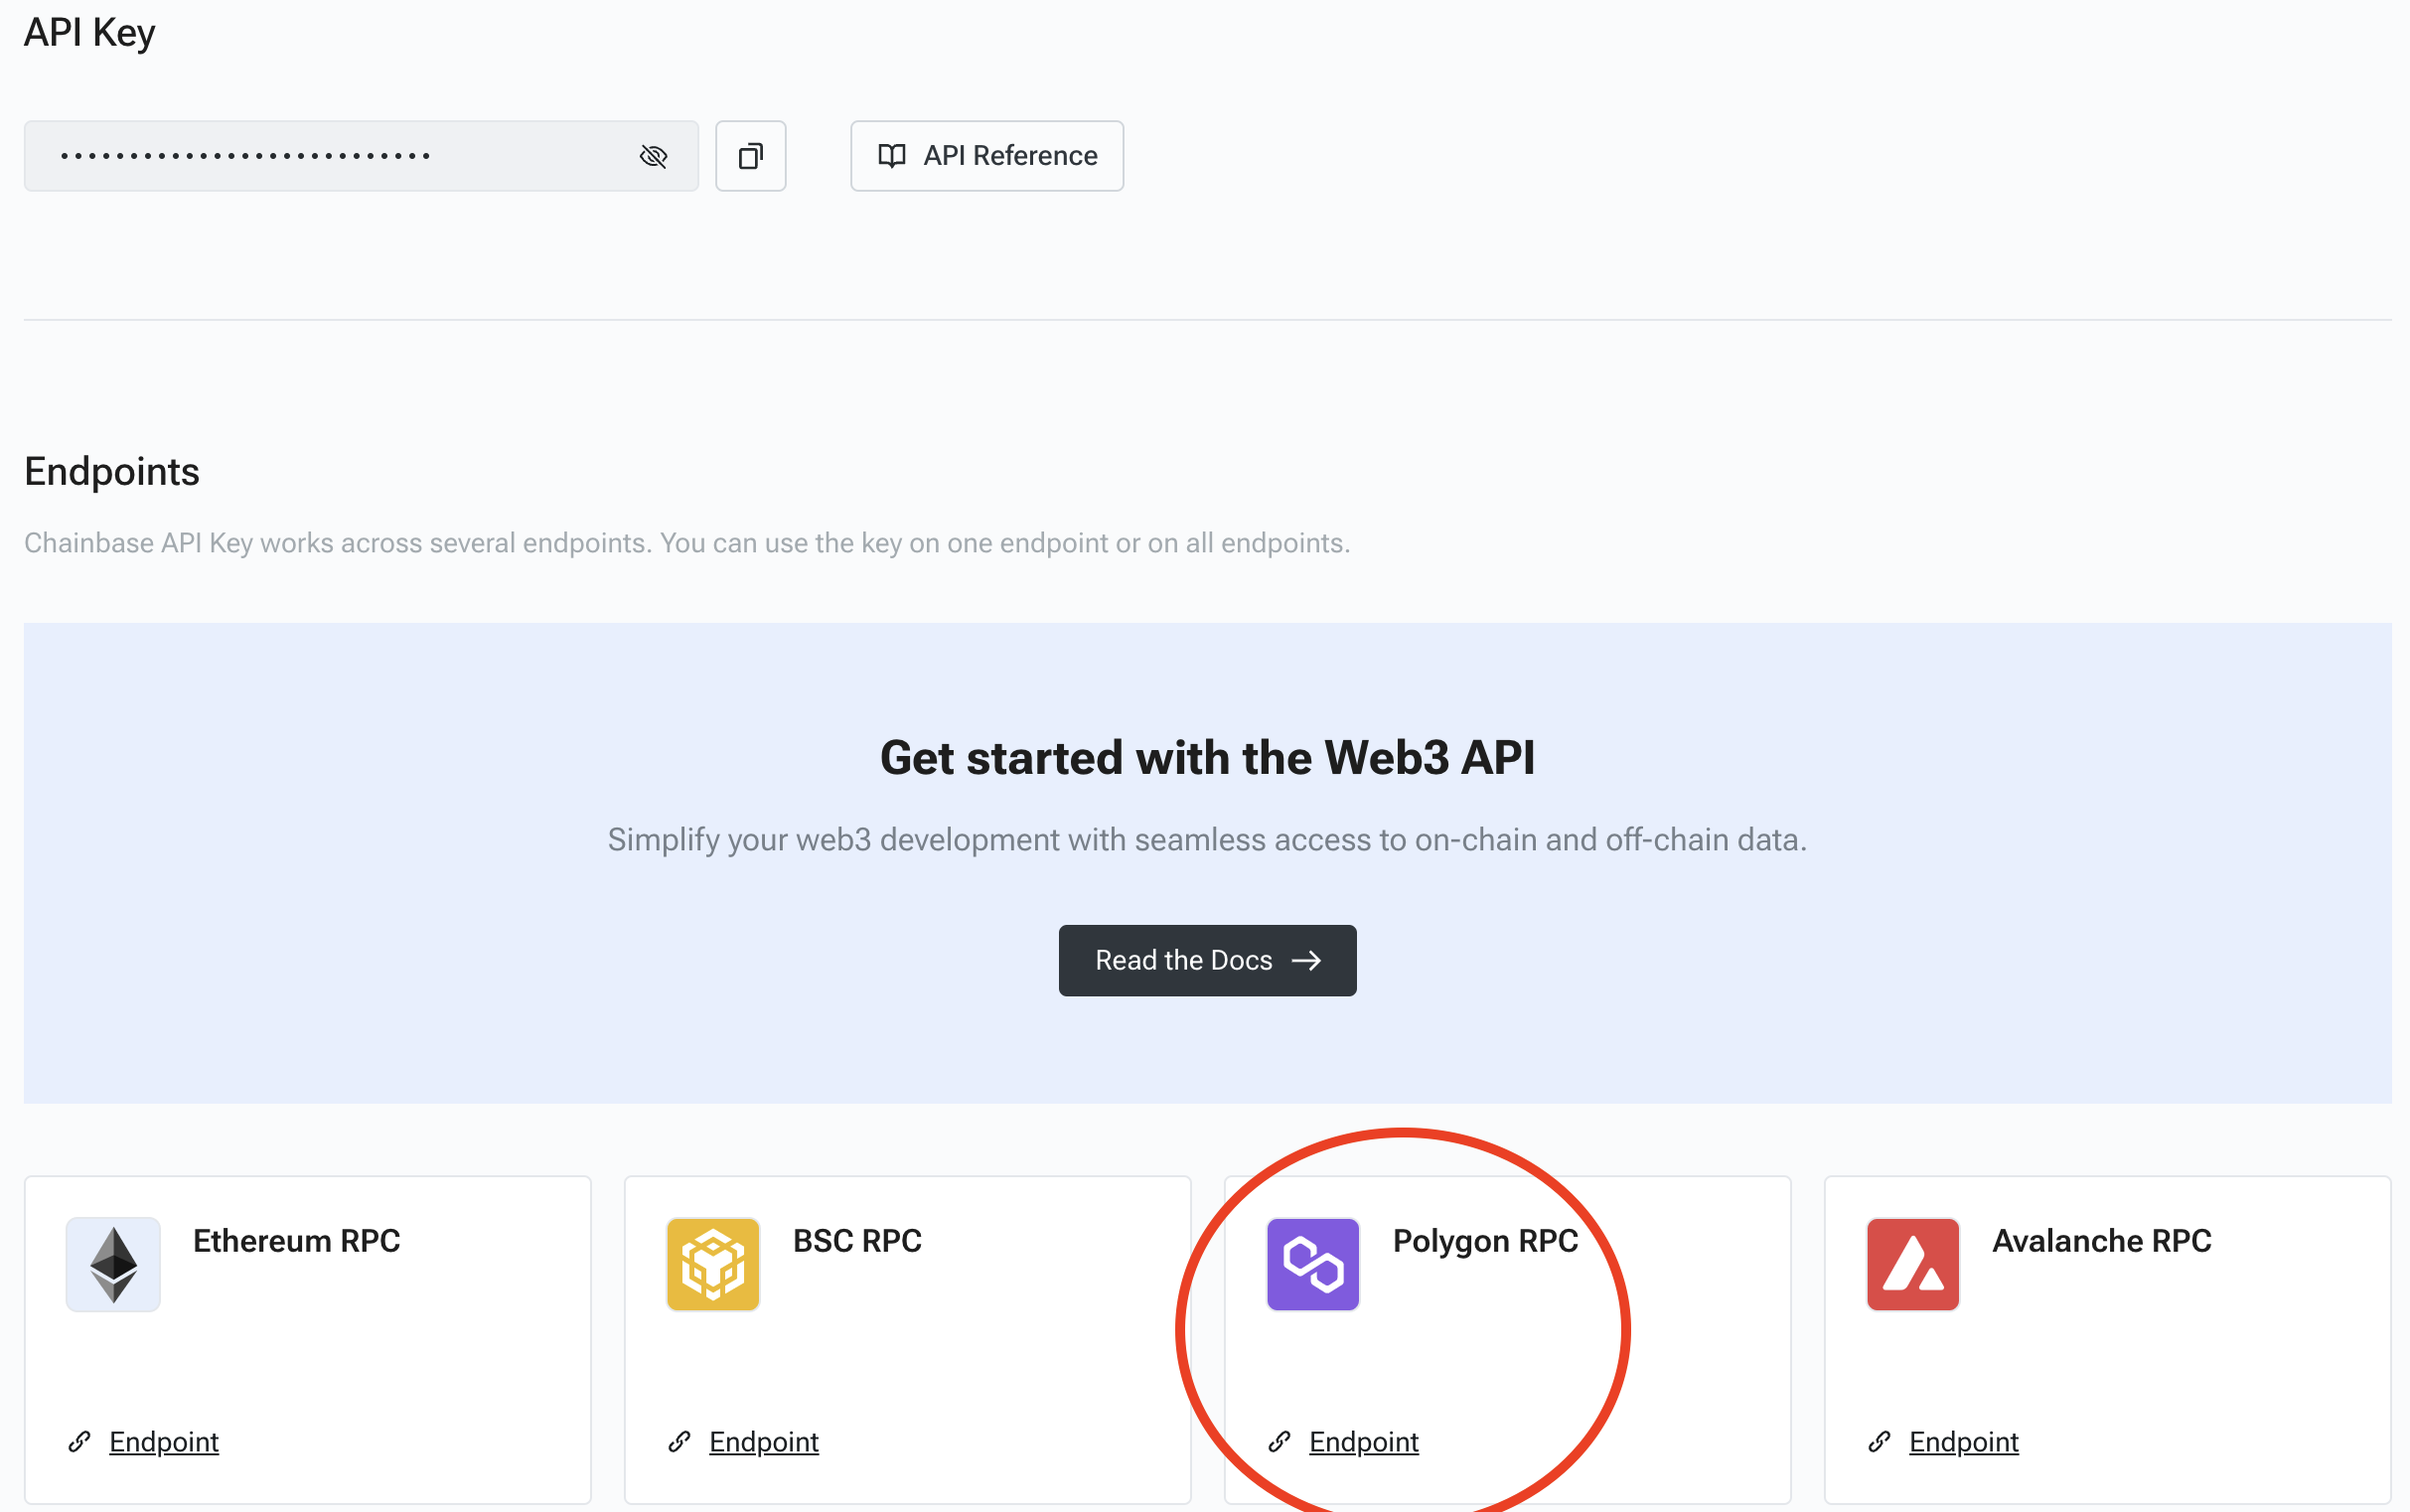
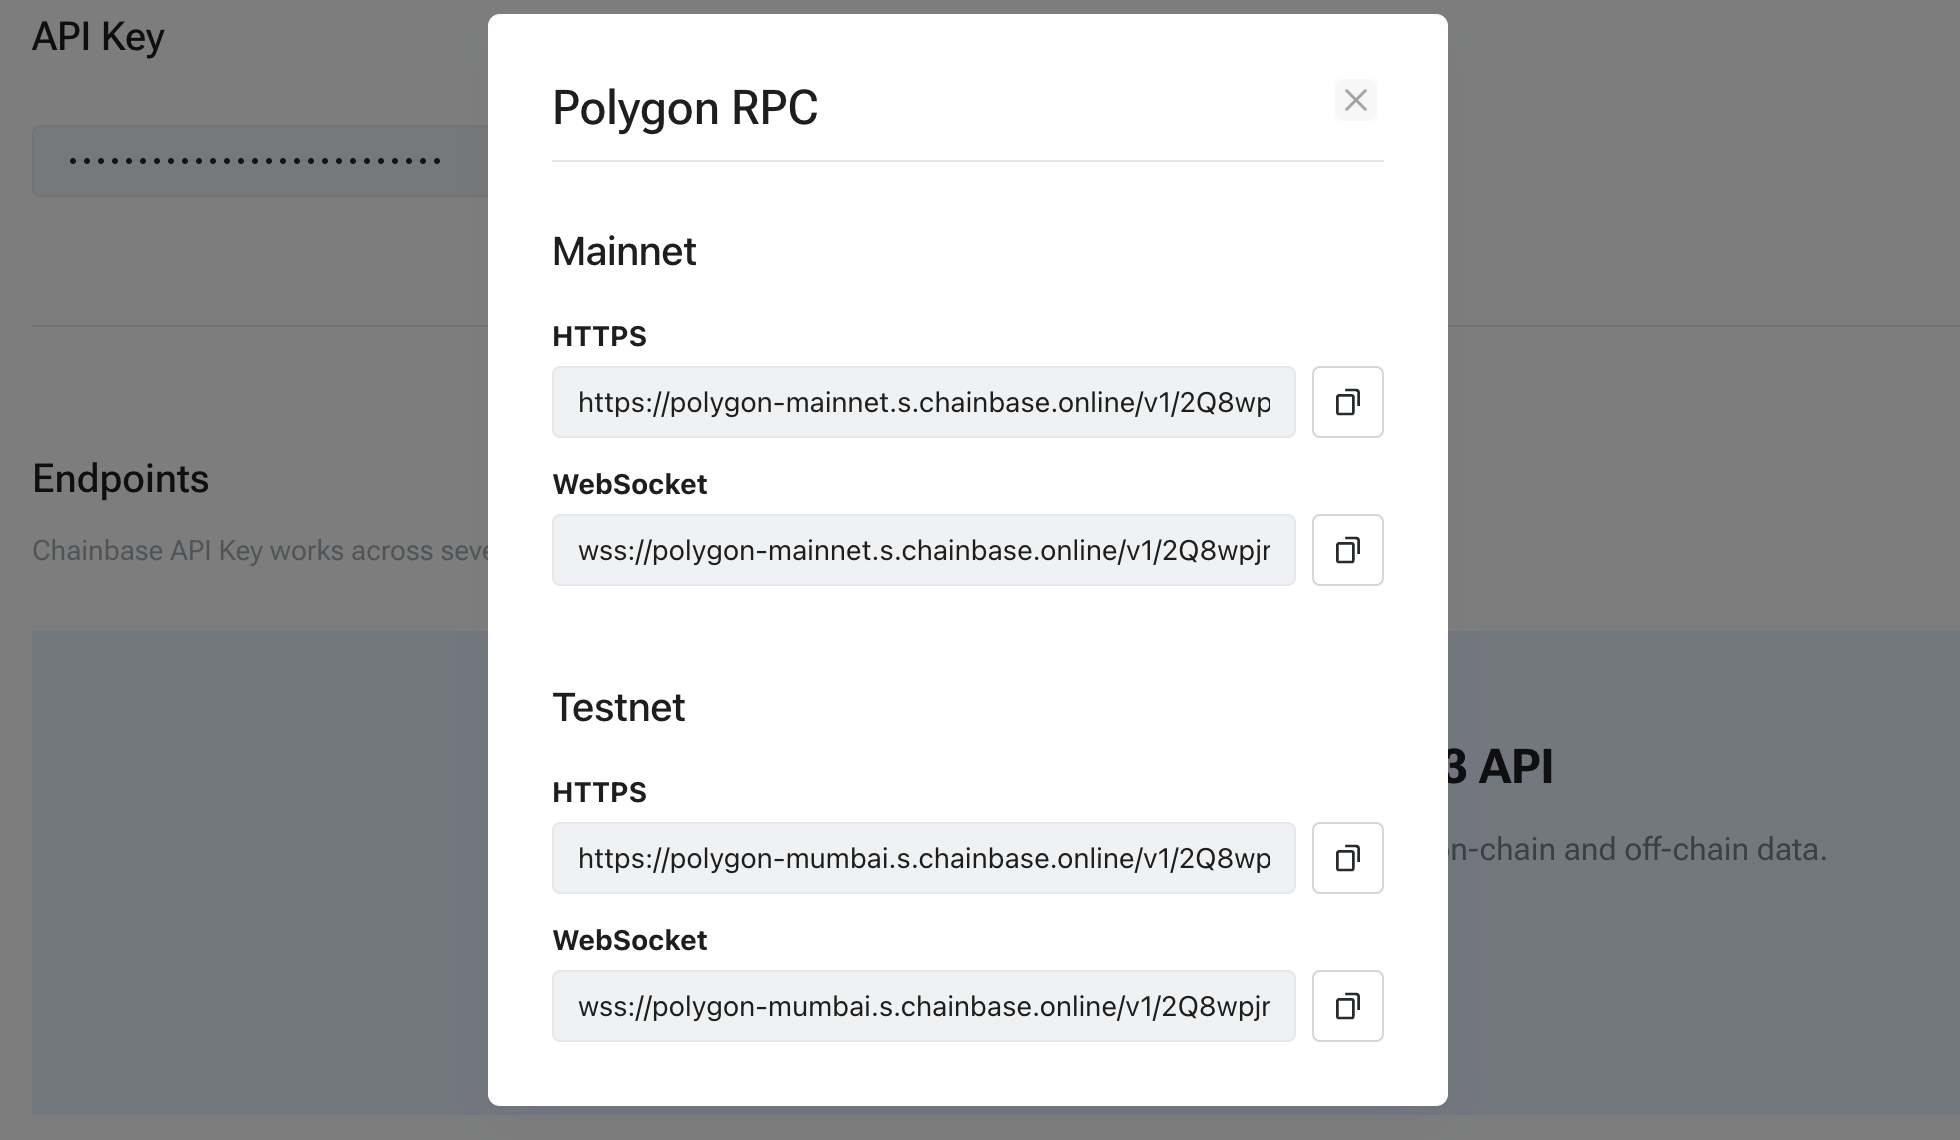
Once you are inside our dashboard, create a new project and click on the target RPC endpoint. Save your Mainnet URL and API key for future reference.
Configuring the Deployment Network
To enable deployment to a remote network, such as the mainnet or any testnet, you need to add a network entry to your “hardhat.config.js” file.
In this example, we will use Mumbai as the target network, but you can add any network in a similar way.
require("@nomicfoundation/hardhat-toolbox");
require("dotenv").config()
// Go to https://chainbase.com/, sign up, create a new API key

const Network_URL = process.env.Network_URL;
const PRIVATE_KEY = process.env.PRIVATE_KEY;

module.exports = {
  solidity: "0.8.9",
  networks: {
    mumbai: {
      url: Network_URL,
      accounts: [PRIVATE_KEY]
    }
  }
};
To ensure the security of our private key, I recommend using dotenv to store the network API and private key in a separate .env file.
Run the following command to install the dotenv package:
npm install dotenv --save
Create a .env file and add the following code. Make sure to include your API and wallet private key in the respective placeholders.
Network_URL=https://polygon-mumbai.s.chainbase.online/v1/chainbase-api-key
PRIVATE_KEY= your-private-key
Replace chainbase_api_key with your actual network API key and your-private -key with your actual wallet private key.
To export your private key from Metamask, open Metamask and go to Account Details > Export Private Key.
Becareful! NEVER put real Ether into testing accounts !!
Deploying the Contracts with Hardhat
Finally, run:
npx hardhat run scripts/deploy.js --network mumbai
If everything went well, you should see the deployed contract address.

Go to Mumbai Polygonscan and search for your deployed contract address. You will find the following transaction details.
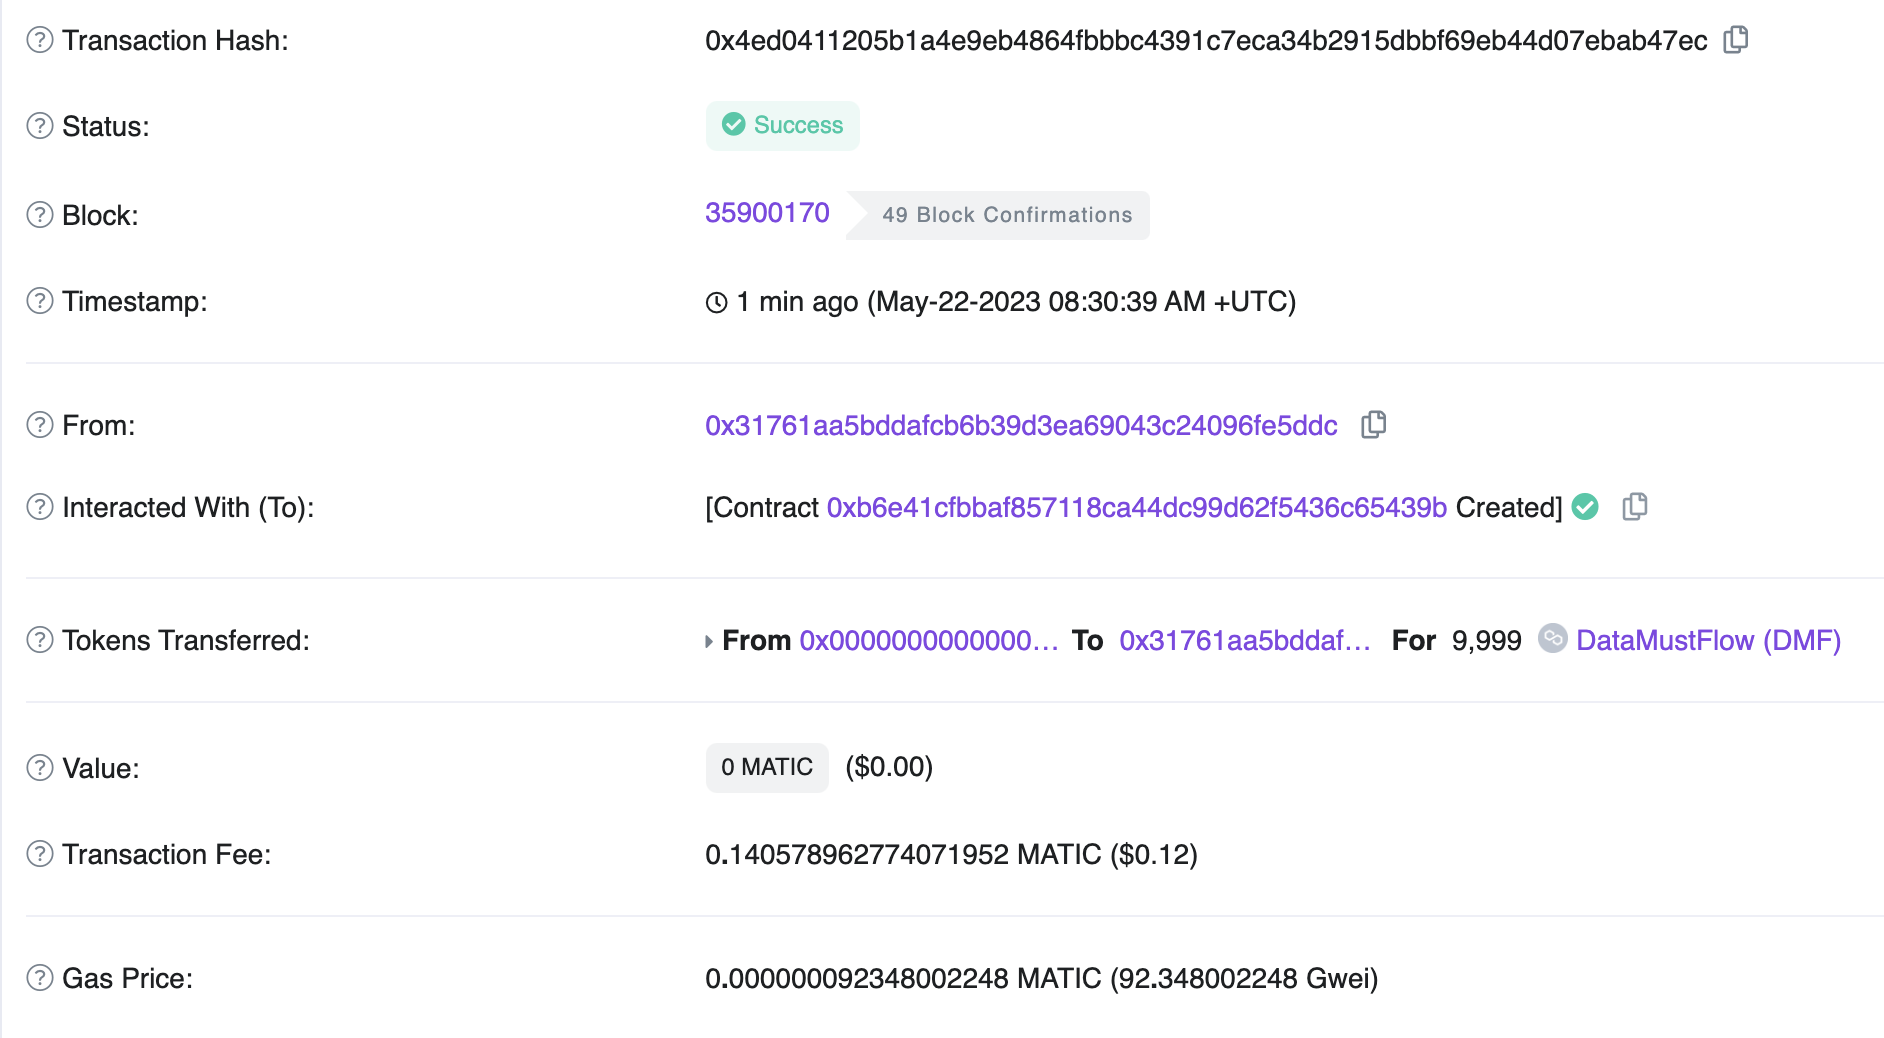
Congratulations! You have successfully deployed your first ERC contract on the blockchain.
About Chainbase
Chainbase is an all-in-one data infrastructure for Web3 that allows you to index, transform, and use on-chain data at scale. By leveraging enriched on-chain data and streaming computing technologies across one data infrastructure, Chainbase automates the indexing and querying of blockchain data, enabling developers to accomplish more with less effort.
Want to learn more about Chainbase?
Visit our website chainbase.com Sign up for a free account, and Check out our documentation.
Website|Blog|Twitter|Discord|Link3